|
Permuter-S English to Japanese and Japanese to English translation shareware Permuter-S easiest to use (Freeware Permuter-F also available). 
|
| Homepage | Guide | Permuter-F | Other softwares |
Guide to Permuter-SContents
1. Installation
 When the error massege “The macro cannot be found or has been disabled because of your Macro security settings” is displayed, change the Word security settings by the folowing procedures:
(If Permuter is installed in a folder other than subfolders of the Document folder, for example in a subfolder of the Program Files folder, it may be troublesome that the message is displayed to confirm if you are the system administrator each time the translation memory or various setting files are read or written during translation process).
After the installation, when you open any Word document or start Word, the Start Permuter icon is displayed on the Quick Access Toolbar. Clicking on the Start Permuter icon opens the Translation from English to Japanese dialog. Although you can perform the translation with only this dialog, it is recommended to open two types of dictionaries by Maruo Editor (maruo875_signed.exe) by clicking on Open the Dictionaries in Settings as shown four panes below in order to select or change word entry in the dictionaries during the translation. Details are explained in the next Translation Procedures. |
![[Four panes]](img\4panes_ps_en.jpg)
2. Translation procedures Place the cursor on a target sentence in the Word document and click the Take button in the Translation from English to Japanese dialog, then the following two types of translations will be displayed (see the figure above).
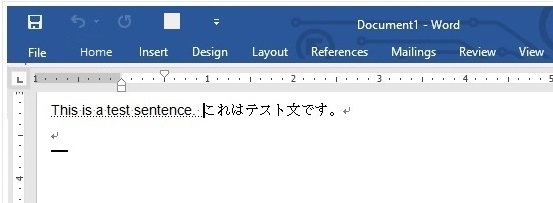
Click a preferred one of translations and modify it as necessary. When you click the Place button, the translated sentence is inserted after the source sentence in the Word document as shown below, and the source sentence is hidden.
2-2. To change a translated word:Changing and overwriting a translated word in a dictionary is refleted on later translations.
For example, in order to change the translated word "テスト" to "試験" in the above translated sentence under the Translation based on the dictionaries title, you first place the cursor on the source word in the source sentence and click the Find word button, then "test" in the dicejp.txt and dicejp.txt files on the right-hand side are highlighted. When you click the Find word button, the source word "test" is copied to Clipboard and the Paste operation (right-click and select Paste or press Ctrl+V) can paste it on a text editor or any applications that handles texts. This function is useful to search words on the web or in various dictionaries. 2-3. To finish the translation:When completing all the translations of the source document, all the source sentences should be hidden. When you click the Erase hidden sources button on the Settings dialog, all the hidden source sentences are deleted and only the translated target sentences are left. Save this document with a different name to complete the document translation. 3. SettingsClicking the Set button on the Translation from English to Japanese dialog opens the Settings dialog as shown below:
|
![[Settings]](img\form1.jpg)
|
Plain text files (*.txt file ending) are used for dictionaries of Permuter which are opened in the Maruo Editor. Each lines consisting of a source word and a translated target word delimited by a tab character in the dicejn.txt file or each lines consisting of a source word, a part-of-speech code and a translated target word delimited by two tab characters in the dicejp.txt file are read from top to bottom. The first matched source word or idiom in each lines is used for a chosen source sentence translation. Therefore, list lines in descending order of source word length for the higher priority of the translated target word at higher position. By the way, add a character such as an asterisk (*) or crosshatch (#) character to currently unused words in the dictionary but easy to recover for future use by removing them. [Translate from to]
[Translation condition]
[Suffix desu-masu form]
[Erase the source instead of hiding it]
[Japanese font:]
[English font:]
[Open the dictionaries] If you click the Open the dictionaries button and Maruo Editor has been installed, the dictionary file specified in the box below will be opened by Maruo. This function is invalid unless Maruo is installed. For your convenience, if you start Maruo, select the Other menu item, select the Environment popped up list item, check the Advance box, select the Arrangement item under the Window list item, check the Resume last window position box and the Each file box and click the OK button, then the dictionary files will be opened at the lastly adjusted position and size. [E-J noun dictionary (text file listing source and target words delimited by tab)] Specify the full path to the English-Japanese noun dictionary file here. This dictionary is a text file consists of every lines of a source word and a target word delimited by tab. Enter the full path to the noun dictionary file or browse it by clicking the [Browse] button. By default, C:\Users\username\Documents\permuter\sample\dicejp.txt is specified. When creating your noun dictionary file, please adapt the format to this sample file and specify your own file name. [E-J part-of-speech-coded dictionary (text file listing source word, part-of-speech code and target word delimited by tab)] Specify the full path to the English-Japanese dictionary file containing part-of-speech codes here. This dictionary is a text file consists of every lines of a source word, a part-of-speech code and a target word delimited by tabs. Enter the full path to the dictionary file or browse it by clicking the [Browse] button. The part-of-speech codes are N for noun, V for verb, P for preposition, etc. Based on those, nouns before and after a preposition is switched in the translated Japanese sentence, and a verb is moved to the end of the following noun group also in the translation. By default, C:\Users\username\Documents\permuter\sample\dicejp.txt is specified. When creating your dictionary file containing part-of-speech codes please adapt the format to this sample file and specify your own file name. [J-E dictionary (text file listing source and target words delimited by tab)] Specify the full path to the Japanese-English dictionary file here.This dictionary is a text file consists of every lines of a source word and a target word delimited by tab. In the Japanese-English translation, matched source words are simply replaced to the target word in the translated sentence based on this dictionary, and no word order in the sentence is changed in the translation. Note: The dictionary files are read from top to bottom, and the firstly matched source and target pair is used for the translation. In order to sort in descending order of the number of characters of source words, you can download the following Excel file sort1.xlsm. [Translation memory (TM)]
[%Match Threshold:] The translation having the highest matching% exceeding the threshold percent specified in this box is displayed under the Matched translation memory source title. [Copy translation to the clipboard] If you check this box, when you click the Place button of the Translation from English to Japanese dialog, the translation is copied to the Clipboard. You can paste it in another editor, etc. in parallel with the translation work on Word using Permuter. When you click the OK button, the items displayed in the Settings dialog are saved and the changes take effect. If you click the Cancel button, all the changes in the Settings dialog are canceled. Clicking the About button displays the About dialog as shown below. This figure is the one before inputting the password. For the input method, see the following “4. Password”: 4. PasswordClicking the About button in the Settings dialog displays the About dialog. If you already have entered a matching password, as shown in the figure below, the entered password is displayed in the Enter password box, and the previous Enter button before the password entry is changed to the Close button, so simply click it to close this dialog. If you paid the Permuter royalty and obtained your password, enter the password in the Enter password box and click the Enter button. By doing so, you can continue to use Permuter without popping up the requesting message for password input. To acquire the password, when you ask us at permuter@gmail.com for the transfer destination, we will first inform you our bank account. After you pay the royal fee, we will inform you of the password. 5. Translating Excel sheet or PowerPonit slide5-1. Translation of Excel sheet
5-2. Translation of PowerPoint slide
6. UninstallationDelete the entire folder for Permuter. 7. ContactIf you have a question, problem or any comments when using Permuter, please feel free to contact us at the following address. Sometimes we may not instantly correspond, however, we assure you to answer as soon as possible.  |
![[About]](img\form3.jpg)
![[About]](img\form3-1.jpg)
![[from2text_xls] dialog](img\from2text_xls.jpg)
![[Descend Texts] dialog](img\sort_descend.jpg)
![[from2text_ppt] dialog](img\from2text_ppt.jpg)
|
MS, Windows, Word, and Excel are trademarks and/or registered trademarks of Microsoft Corporation. The names of other companies and products mentioned herein may be the trademarks of their respective owners. Copyright (C) Permuter. All Rights Reserved. |